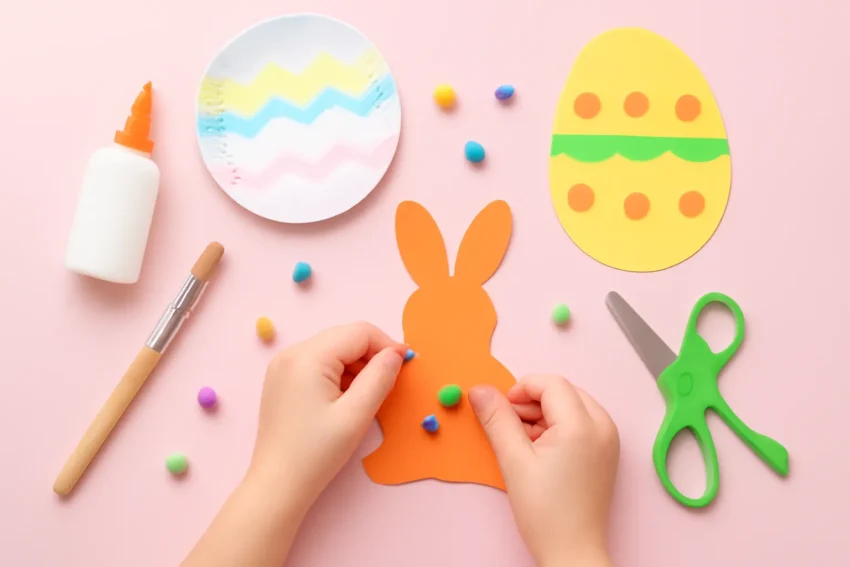
Easter is a wonderful time for families to celebrate with hands-on activities, playful learning, and plenty of color. Childrens crafts for Easter offer a welcoming doorway for kids to express their creativity, develop fine motor skills, and enjoy meaningful traditions. The best craft projects are those that are simple to set up, use safe materials, and invite children to experiment with color, texture, and pattern. In this article, you’ll find a wide range of ideas—from quick, easy Easter crafts for busy days to more involved creative Easter activities that stretch imaginations. Each activity includes practical tips, age guidance, and variations so you can tailor things to your family’s interests and space.
When time is short or you’re introducing children to the joy of crafting, start with simple, bite-sized projects that yield visible results quickly. These activities are especially good for younger children or groups with mixed ages. They emphasize process, not perfection, and can be extended with optional embellishments as children gain confidence.
Quick Paper Bunny Masks
Materials: colored construction paper, scissors, stapler or tape, crayons, elastic string.
Fold a sheet of paper in half and trace a simple bunny head shape along the fold so the mask sits flat. Cut out, leaving the fold intact for the ears.
Decorate with crayons, stickers, and patterns. Add a nose, whiskers, and a big smile.
Attach elastic string to either side so kids can wear the masks. For younger children, skip elastic and use a headband instead.
Variations: use different colors for each family member, add googly eyes, or create a “bunny posse” by making several masks in different sizes.
Marbled Egg Collage
Materials: white cardstock or a card-sized base, old magazines or tissue paper, glue, scissors, water, shallow dish, food coloring or dye.
Fill a shallow dish with a little water and drop food coloring to create a swirling marbled effect.
Tear small shapes from magazines or tissue paper and dip into the colors to create a mosaic of egg shapes.
Arrange on the card to form a large “Easter egg” collage. Let dry and display.
Tip: If you don’t have water-based dye, use colored tissue paper pieces and mod podge or glue to secure them.
Pom-Pom Chick Garland
Materials: yellow and orange pom-poms, string, glue, googly eyes, scissors.
Glue two small yellow pom-poms for a chick body and head, and a tiny orange pom-pom for a beak.
Glue on two googly eyes and a small tuft of paper or yarn as a crest if desired.
String the finished chicks along a length of twine to create a cheerful garland for the doorway or mantel.
Variations: make a bunny garland with white pom-poms and pink accents, or switch to pastel colors for spring ambiance.
Creative Easter Decorations You Can Make as a Family
Decorating for Easter is a fantastic way to practice planning, color coordination, and teamwork. With a few simple supplies, kids can contribute to a festive home environment that feels personal and celebratory. Here are some creative Easter activities for kids that double as decor ideas.
Seal with a non-toxic finish if you plan to display them outside or want added durability.
Tip: For younger children, use sponges or stamps to apply paint rather than brushes to reduce mess and frustration.
Egg-Cillow Decor: Painted Egg Pies as Wall Art
Materials: craft foam, acrylics or fabric markers, scissors, glue, string or ribbon.
Cut egg-shaped templates from craft foam and decorate with paint or markers. Add patterns such as checks, stripes, or floral motifs.
Attach small loops of ribbon to the top of each egg shape and hang on a wall or bulletin board as a seasonal display.
Nature-Inspired Centerpiece
Materials: twigs, moss, dyed eggs (optional), small nest bowls or shallow baskets, hot glue (adult supervision required), decorative accents like feathers or faux flowers.
Gather a few branches and bunch them in a vase or jar to create a mini birch-branch centerpiece.
Fill a shallow nest with dyed or un-dyed eggs and tuck in moss for texture.
Arrange colorful accents to evoke a springtime meadow feel.
Safety note: supervise hot glue use or substitute with low-temp glue sticks or white glue when children are involved.
Egg-Themed Activities That Blend Craft and Play
Beyond just making objects, egg-themed activities can integrate storytelling, problem solving, and teamwork. These ideas invite kids to think creatively while engaging in hands-on practice.
Cut egg cartons into individual «eggs» and paint them in cheerful colors.
Add features such as wings, ears, or tails using additional pieces of cardboard or foam.
Glue on googly eyes and other embellishments to create a small herd of friendly creatures.
Alternative: transform egg carton cups into tiny planters or mini animated characters for spring storytelling.
Story-Prompt Egg Hunt
Materials: plastic eggs, small slips of paper with prompts, baskets for collecting eggs.
Write simple prompts on slips of paper, such as “Name three spring flowers” or “Act out a chick’s first hop.”
Place prompts inside eggs and hide them around the room or yard.
Kids collect eggs and read prompts aloud, turning the hunt into a playful learning moment.
Benefit: promotes language development, memory, and social interaction as children share ideas with siblings or friends.
Egg-Dying Science Station
Materials: white eggs (hard-boiled for older kids or raw for younger ones under supervision), food coloring or natural dye, cups, vinegar (for color fastness), paper towels.
Explain the science behind dye absorption and color mixing.
Let kids dye eggs in small cups, observing how colors change when mixed.
Set up a drying station with paper towels and a tray to catch drips.
Safety note: hard-boiled eggs are safer to handle for curious hands, and always supervise dye use with younger children.
Paper Crafts and Card Making for Easter Celebrations
Paper crafts are incredibly versatile and accessible. They allow children to design with precision or loosen up with free-form creativity. Here are some childrens crafts for easter that focus on paper, color, and texture.
Fold the card stock in half to create a standard card.
Decorate the front with cut-out shapes (bunnies, eggs, chicks) and color them.
Inside, write a message or include a short poem about spring and family.
Tip: Create a batch of cards to share with grandparents, neighbors, or school friends.
Egg-Shaped Paper Quilling Projects
Materials: quilling paper strips, glue, a quilling tool (or a thin skewer), a cardstock base.
Roll and shape the paper strips into simple coils, teardrops, and curves.
Arrange the shapes to form an egg outline or a decorative pattern on the card.
Glue in place and let set before framing or gifting.
Note: quilling can be intricate for very young children; offer larger shapes or pre-cut strips to simplify.
Origami Easter Figures
Materials: origami paper or square pieces of colored paper.
Learn simple folds to create animals or eggs, such as a jumping bunny or a blooming flower.
Combine several folded pieces to build a mobile or a decorative bouquet of origami chicks.
Advantage: origami strengthens spatial reasoning and patience while producing elegant decorations.
Nature-Inspired and Outdoor Easter Crafts
Spring is a season of growth, so using natural materials adds a wonderful dimension to eco-friendly Easter crafts. These activities connect children with the outdoors and teach respect for the environment.
Leaf-Rubbed Newsprint Eggs
Materials: hard-boiled eggs, fresh leaves (or pressed leaves), crayons or pencils, newsprint or watercolor paper.
Place a leaf on the egg and rub over it with a crayon to transfer the leaf’s shape and veins onto the egg.
Experiment with different leaf shapes—fern, maple, oak—or stack several layers for a collage effect.
Eco-tip: Save fallen leaves from a park walk and let kids press and annotate their leaf shapes for a nature journaling project.
Pinecone Chick Ornaments
Materials: pinecones, yellow and orange felt or paper, glue, googly eyes, small beak shapes.
Attach a yellow chick face on the pointed end of the pinecone, using felt for a beak and feet cutouts.
Glue on two eyes and additional feather details using small paper strips.
Hang the finished chick ornaments on a spring tree or mantelpiece.
Alternative: use acorns with painted caps as mini Easter ornaments for a woodland aesthetic.
Natural Dye Dying with Onion Skins, Beet Peels, or Avocado Pits
Materials: natural dye sources (onion skins, beet peels, avocado pits), water, a pot, strainer, white eggs.
Simmer color sources in water to extract dye for about 20-30 minutes.
Strain the liquid and add eggs to the warm bath to dye them naturally.
Rinse and dry, then display in a natural-wood or ceramic bowl for a rustic look.
Teaching moment: discuss how colors emerge from natural materials and why some ingredients produce deeper tones than others.
Recycled Materials and Upcycling for Easter Fun
Reusing materials that would otherwise be tossed is a sustainable approach to Easter crafts. It fosters ingenuity and shows kids how everyday objects can become art.
Cut cardboard into egg shapes, then combine multiple pieces to create a freestanding sculpture or a mosaic wall piece.
Paint the surface with bright colors and patterns.
Tip: Build layered pieces that interlock to teach constructive play and support early engineering concepts.
Bottle Cap Mosaic Eggs
Materials: plastic bottle caps in various colors, thick cardboard or a sturdy base, glue, markers.
Arrange the bottle caps to form an egg shape or a larger Easter scene on the base.
Glue caps in place and add a decorative border or a short greeting on the base.
Accessibility note: use larger caps for younger children to help with grip and control.
Art Techniques and Mixed-Media Approaches
Trying different media fosters creativity and helps children discover personal artistic preferences. These creative Easter activities blend painting, collage, and texture work.
Egg-Stamp Printing
Materials: eggshell halves, acrylic paints, stamp pad or sponge for texture, paper.
Dip the shell’s interior into paint and press it onto paper to create a repeat stamp pattern.
Layer several colors and vary the pressure for different textures.
Tip: save shells for a later “shell print” project to extend the activity.
Collage Quilt: A Patchwork of Easter Motifs
Materials: old magazines, construction paper scraps, scissors, glue, a large poster board.
Cut out motifs like eggs, flowers, bunnies, and spring leaves from magazines and paper scraps.
Arrange them on the poster board to form a cohesive “quilt” pattern, then glue in place.
Educational angle: use this as an opportunity to discuss color theory, symmetry, and composition with older children.
Baking and Edible Crafts: Tasty Easter Creations
Food-themed crafts can be a delicious way to celebrate. When safety is prioritized, kids can enjoy edible arts while learning about measurements, following instructions, and hygiene.
Roll out dough and cut shapes; bake according to recipe instructions.
Decorate with colored icing to create smiling bunnies, eggs with patterns, and seasonal messages.
Let the icing set before serving or sharing with friends and family.
Healthy twist: make a “fruit egg” by hollowing out a small orange or apple and filling with a fruit salad, designed to visually resemble an Easter egg.
Shape the treats into small nest-like baskets using the silicone mold or hand-formed shapes.
Fill with candy eggs and green candy grass, then decorate with edible markers for details.
Note: be mindful of dietary restrictions and choose allergy-friendly ingredients when needed.
Safety, Accessibility, and Age-Appropriate Tips
Craft sessions are most enjoyable when safety and accessibility are considered from the start. Here are practical guidelines to help ensure a positive experience for all children.
Non-Toxic Materials and Tools
Prefer non-toxic paints, markers, and glues labeled safe for children.
Avoid small parts for children under three to reduce choking hazards.
Use blunt-tipped scissors and child-safe glue sticks when possible.
Supervision and Age-Appropriate Projects
Preschoolers (2-4 years): focus on big shapes, stickers, stamping, and simple collages with supervision.
Early elementary (5-7 years): introduce basic assembly tasks, cutting with safety scissors, and multi-step projects with adult support.
Older children (8-12 years): try more complex builds, paper quilling, origami, and blended media projects with less direction.
Adaptations for Special Needs
Offer fidget-friendly tools like larger brushes or thick markers.
Provide alternative textures and higher-contrast color palettes to support visual perception.
Break tasks into shorter segments with clear, posted steps and calm-down corners if needed.
Tips for Organizing a Craft-Focused Easter Celebration
Organizing a crafting session, party, or family gathering around Easter crafts can be as simple or as elaborate as you like. Here are practical tips to help you plan a smooth, enjoyable experience.
Plan in Thematic Blocks
Create a loose schedule with theme blocks, such as paper crafts, color-dyeing experiments, nature-inspired activities, and baking projects. This helps kids stay engaged and reduces transitions.
Set Up Stations
Art station with brushes, markers, paper, and glue.
Nature station with leaves, pinecones, and natural dyes.
Edible crafts station with kid-safe utensils and small portions.
Display and Celebrate Creations
Allow time for a short “gallery walk” where kids show their work to the group. Create a simple display at a low height—on a table, a wall, or a ribbon line—so children can appreciate their peers’ efforts.
Variations and Variants to Expand the Semantic Range
The web is full of ideas for childrens crafts for easter, and many families find that mixing ideas from here with local traditions yields the most meaningful results. Below are some alternative variations and related topics that broaden the semantic breadth:
Spring-themed crafts that extend beyond Easter, focusing on renewal, flowers, and animals.
Educational variations tying Easter crafts to math (counting eggs, symmetry patterns) or science (color theory, materials science).
DIY Easter decorations for classrooms or community centers, designed for group participation and display.
Story-driven crafts that begin with a short tale about spring and lead into a craft activity inspired by the story.
Low-cost or no-cost ideas that reuse household items, encouraging thoughtful consumption and creativity.
Learning Outcomes and Benefits of Easter Crafting
Engaging in childrens crafts for easter yields multiple learning outcomes that extend beyond art. Parents and teachers often notice improvements in several domains:
Fine motor skill development through cutting, drawing, gluing, and assembling small pieces.
Spatial reasoning and planning as children decide how to arrange elements on a card or collage.
Color recognition and mixing as children experiment with dyes and paints.
Following multi-step instructions and sequencing as they complete a project from start to finish.
Language and storytelling when describing their craft, sharing materials, or presenting to others.
Social-emotional growth through collaboration, sharing, and celebrating each other’s creations.
Environmental awareness when incorporating recycled materials and natural elements.
Display Ideas: Showcasing the Works
Once projects are complete, consider several ways to display and celebrate children’s work. Display can be as simple as a dedicated corkboard, a homemade seasonal banner, or a rotating gallery on a hallway wall.
Create a dedicated “Easter Corner” with a garland, lanterns, and a shelf of finished crafts.
Rotate crafts weekly to keep the display fresh and give kids a sense of accomplishment as their work is featured.
Photograph projects and build a small digital gallery or family scrapbook to revisit the crafts later.
Host a mini exhibition for family or friends, inviting young crafters to explain their pieces and techniques.
Conclusion: The Joy of Creating Together
Childrens crafts for Easter blend creativity, learning, and family bonding into a seasonal tradition that can be revisited year after year. From easy Easter crafts that spark curiosity to creative Easter activities that challenge older kids, there is something for every age and interest. The most important elements are safety, accessibility, and a spirit of play. By providing a range of materials, offering guidance without overt control, and celebrating each child’s unique expression, you can foster not only beautiful decorations and tasty treats but also lasting memories and a love of making that carries well beyond the holiday season.